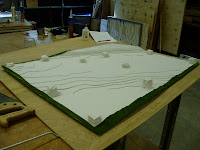


Well, it is long overdue that I post a blog. The problem was that I was getting many school assignments and just did not have the time to model that I did at the beginning of the semester when two of my four professors were out sick. Once I had a full load of classes again, and my chorus was getting ready to go on tour, and spring break came, I never felt like I made enough progress on the model to make a blog. Anyway, here is what has happened since.
I put grass on the model. Modeling grass is super easy. It comes on a roll that warps with heat (a heat gun is mentioned in the directions, but everybody uses a hairdryer according to the man at the hobby shop). So you spray on glue, roll out the grass, blow-dry it, and you are done. The only thing that I recommend that is not in the directions is wear a thick winter glove on the hand that you are using to smooth out the grass. Otherwise, you will burn yourself.
I knew in advance that my four panels would not line up seamlessly as is, plus they will warp, and they do not transport well as is… so I built a tray for each of them. This consisted of making columns of scrap foam-core to make the underside of the model the same level (see picture). Then I cut out a sheet of 1/4" (5mm) plywood and glued it underneath. Next, I cut out two strips the length and two strips the width of each section (four pieces total) and glued them to the sides of each section to make walls. It is like having a shoe box lid turned upside-down, and putting my model in it. So, I made one of these tray-like-things for all four sections. It looked nice. The perfectly plum edges of the tray really emphasized the contours of the hills. Some of the plywood was warped, but it really did not take too long to make all four trays.
My parents and I decided to ship home my model so that I could work on it this summer. During the week this month, I am interning for a design and construction firm (I make computer model of proposed extensions designed by the in-house architect to be used for both his design process and for marketing. Message me if you want to see some). Next month, I am going to be a camp counselor. But on the weekends, I could be working on my model (such as right now). So I made this huge box from cardboard left over from another class's project (they made real boats from cardboard and duct tape), and slid all of the sections into it. The box was as big as a section, a foot (32 cm) deep, and weighed 55 lbs (25 kg). It cost $100 to ship it home, but when I got to the UPS place after walking half a mile with this huge box on my back like a turtle, that the weight did not affect the price of the shipping, it was the enormous size of the box. The price would have changed a total of $2 if it had weighed between 25lbs and 100lbs. But, if I had only put two panels in a box instead of four (and had two boxes), each box would have cost $30 to ship, or $60 total. I think I will do that when I send it back.
Anyway, when I got home for the summer, the box was waiting for me in the garage. The box itself was not ripped or opened, but it seemed quite a bit flattened. What was 12” deep was now 4” deep. When I opened it, all of the 1/4" strips that made the walls of the tray-like-things had been broken off, and each section was sitting right on top of each other. What I think happened, was that UPS put this box under many other boxes, laying flat of its face. The other boxes crushed all of the trays. I was a little upset, but also glad that there weren't any buildings to be crushed in the move.
My parents hire a master-carpenter to fix a lot of things around the house. When they saw what happened to the model, they offered to have him come round and help me remake the frame. We met yesterday to discuss it. Mick (the master-carpenter) and I are going to put a 3/4" frame under the existing sheet of plywood and screw it to the model, so that the model is sitting 3/4" of the ground. Then we are going to remake those strips that broke off, but make them taller (3/4" taller to match how far off the ground the model is now), and have them be 3/4" thick. We will also screw it all together instead of gluing it. It will be heavy, but just like to see UPS try to break it next time. I know this sounds confusing, so I will take pictures of the process for you visual learners out there.
We will build this frame next week maybe. In the meantime, I am going to be working on the roads. Making sure my map is accurate compared to more recent ones, etching away the grass, painting the roads black/grey, etching away the sidewalks, and painting the yellow and white lines on the roads. The roads and sidewalks are my goals for the summer. If I have time, I will either plant trees in the heavily forested areas, or start making some buildings. I will probably make the forest instead of buildings because they would fare better if the trays break again. Another option would be to have my parents drive me back to school (6 1/2 hours due north). I will think about it and let you know.
